What is GitHub?
GitHub is a code hosting platform for version control and collaboration. It lets you and others work together on projects from anywhere.
Why Use GitHub?
If you and your colleagues are working on the same website, and are updating the files by making changes, there will be no issues. However, if you and your colleague happen to make changes to the same page of the website, then there are chances of each other’s work being overwritten.
So here comes a version control software, which deals with the changes made to a file without allowing overwriting.
How to use GitHub?
To start using GitHub, you need no prior knowledge of coding at all. You need to download GitHub software to your computer. This offers you a visual interface through which you can manage your files locally. These files will be conveyed to the Web when you create an account in GitHub.
From then, you may start browsing the files of other GitHub users. You can also download those files, edit them and use for yourself. Even your files can be used likewise by other users. Git saves memory of all the changes made, so the original data is not lost.
How to Host Files in GitHub?
Go to github.com and sign-up for a free account, if you don’t have one. Choose the free plan as that’s all we need for hosting our files.
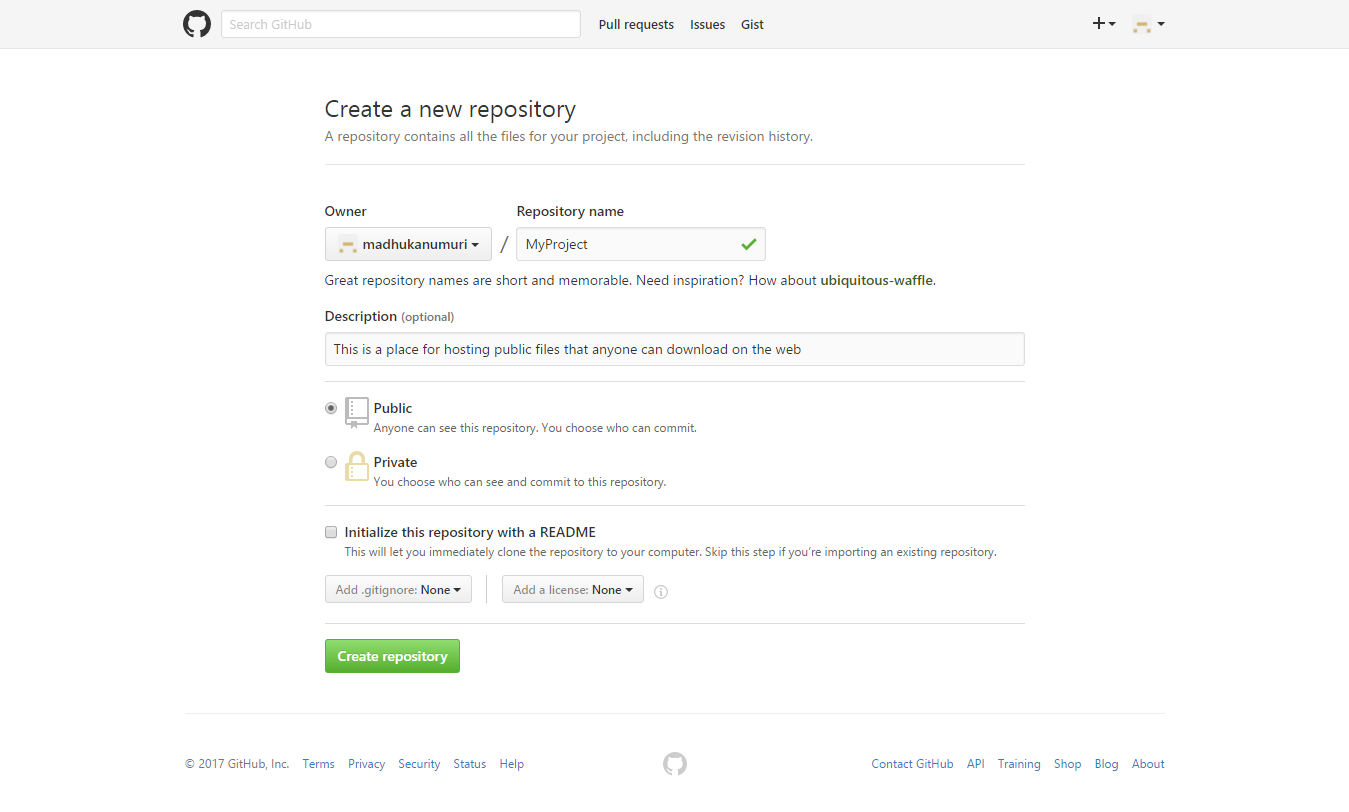
Step1 : Create a Repository
- Click the “New Repository” button to create a new repository for hosting your files.
- Name your repository MyProject
- Write a short description.
- Select Initialize this repository with a README.
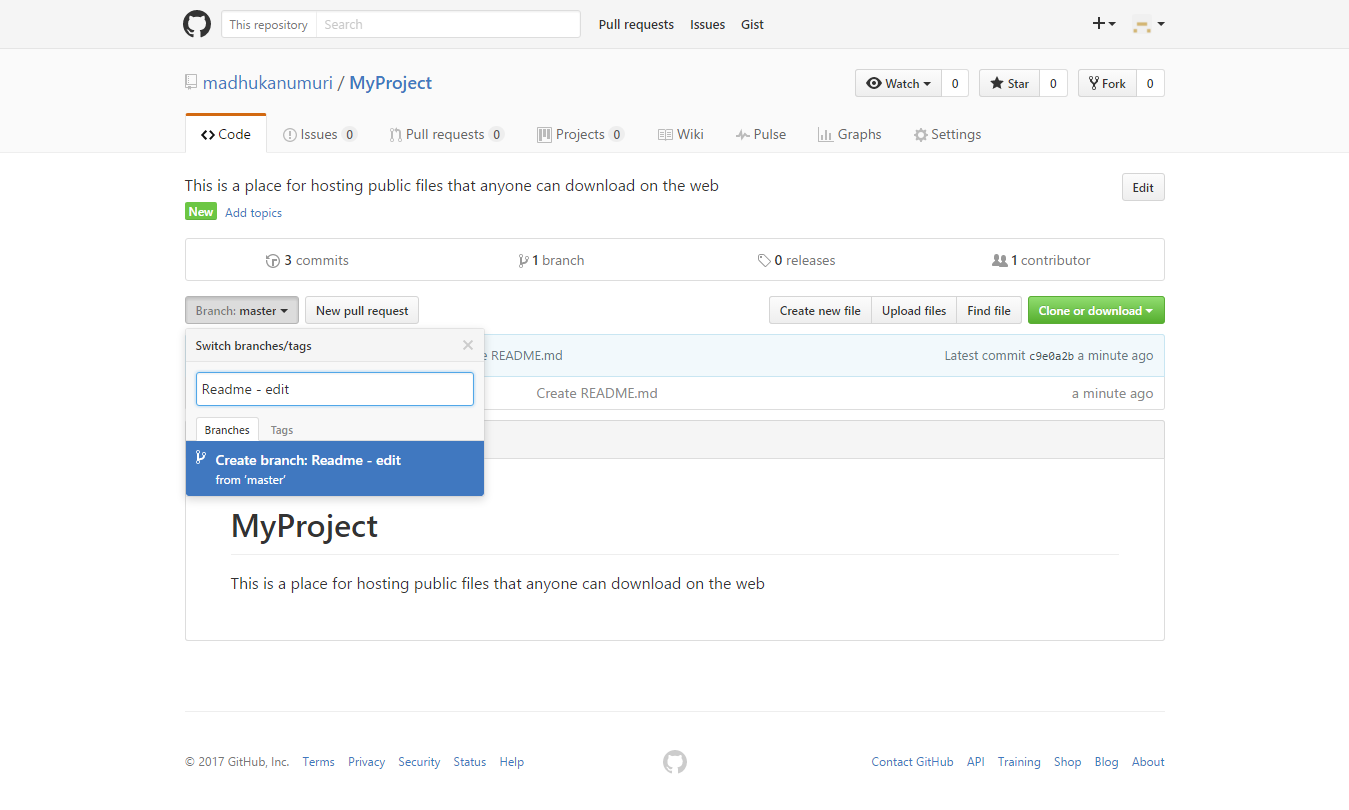
Step 2 : Create a Branch
- Go to your Repository MyProject
- Click the drop down at the top of the file list that says branch: master.
- Type a branch name, Readme-edit, into the new branch text box.
- Select the blue Create branch box
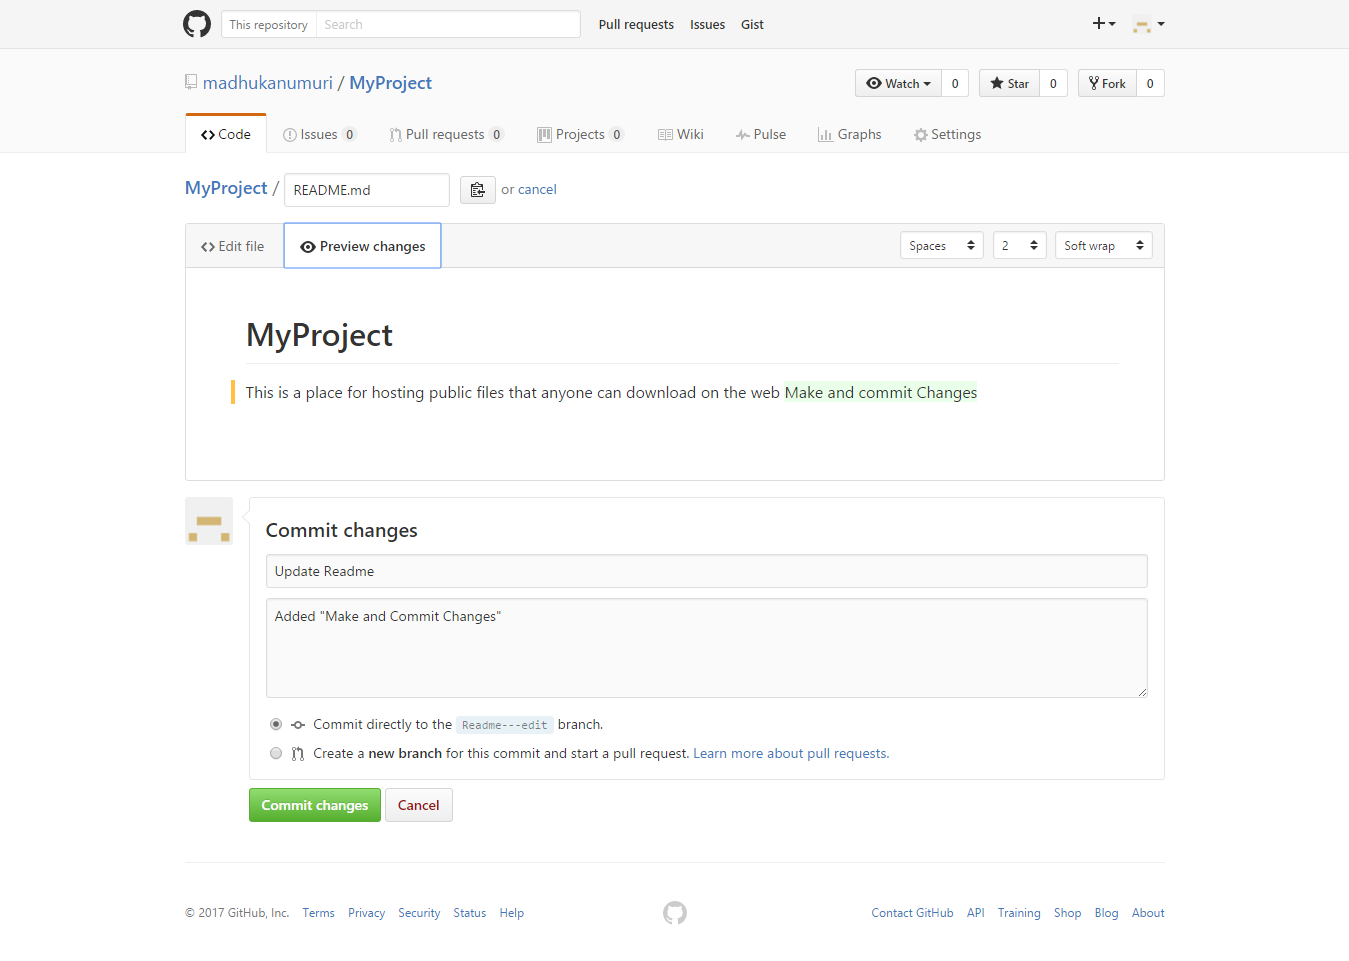
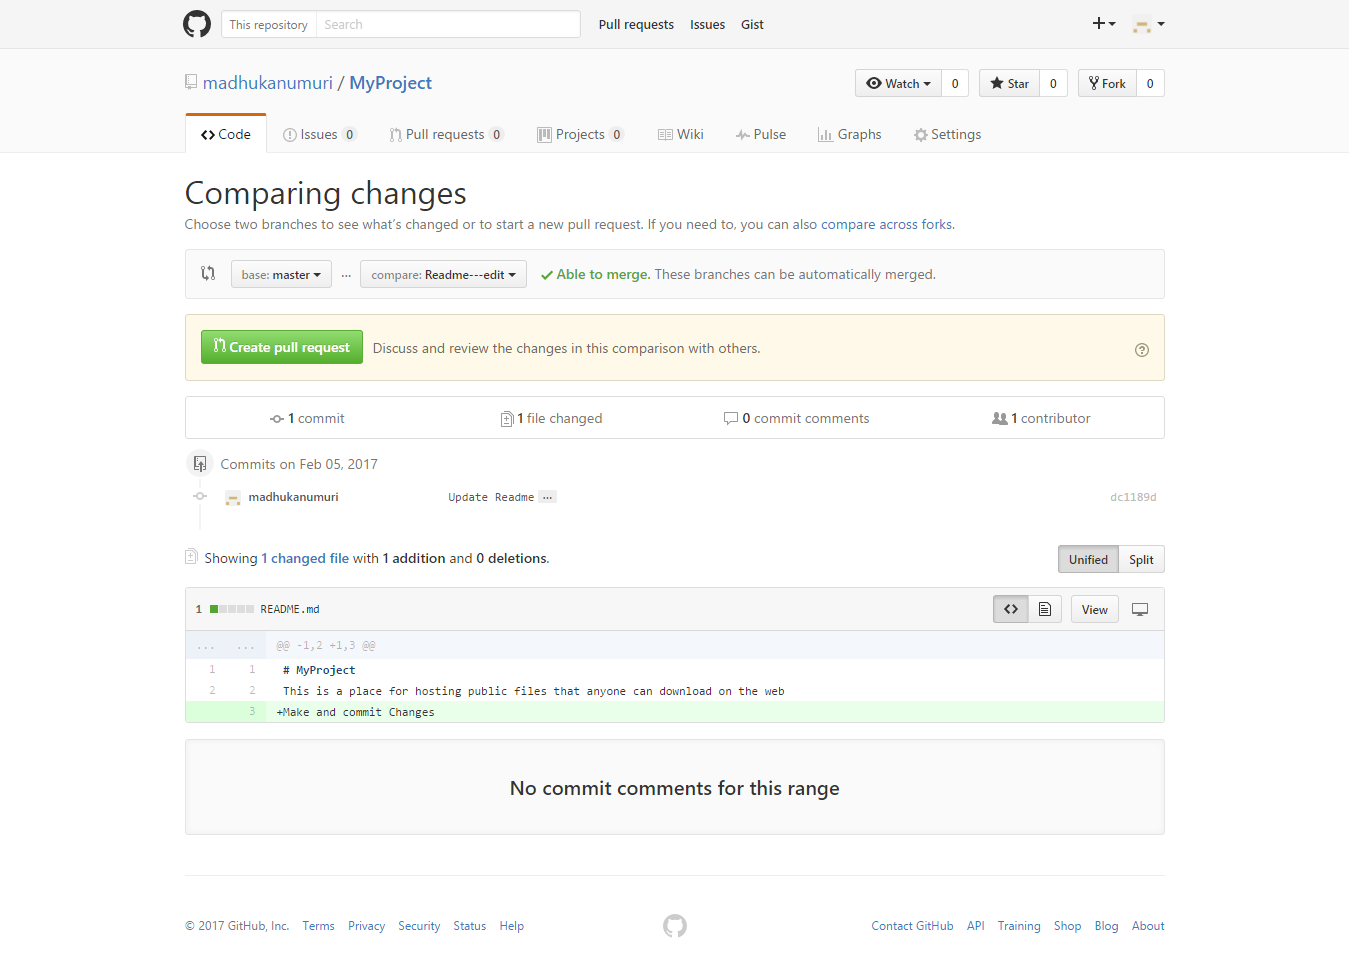
Step 3 : Make and Commit Changes
- Click the README.md file.
- Click the Edit icon in the upper right corner of the file view to edit.
- In the editor, Write a commit message that describes your changes.
- Click Commit changes button.
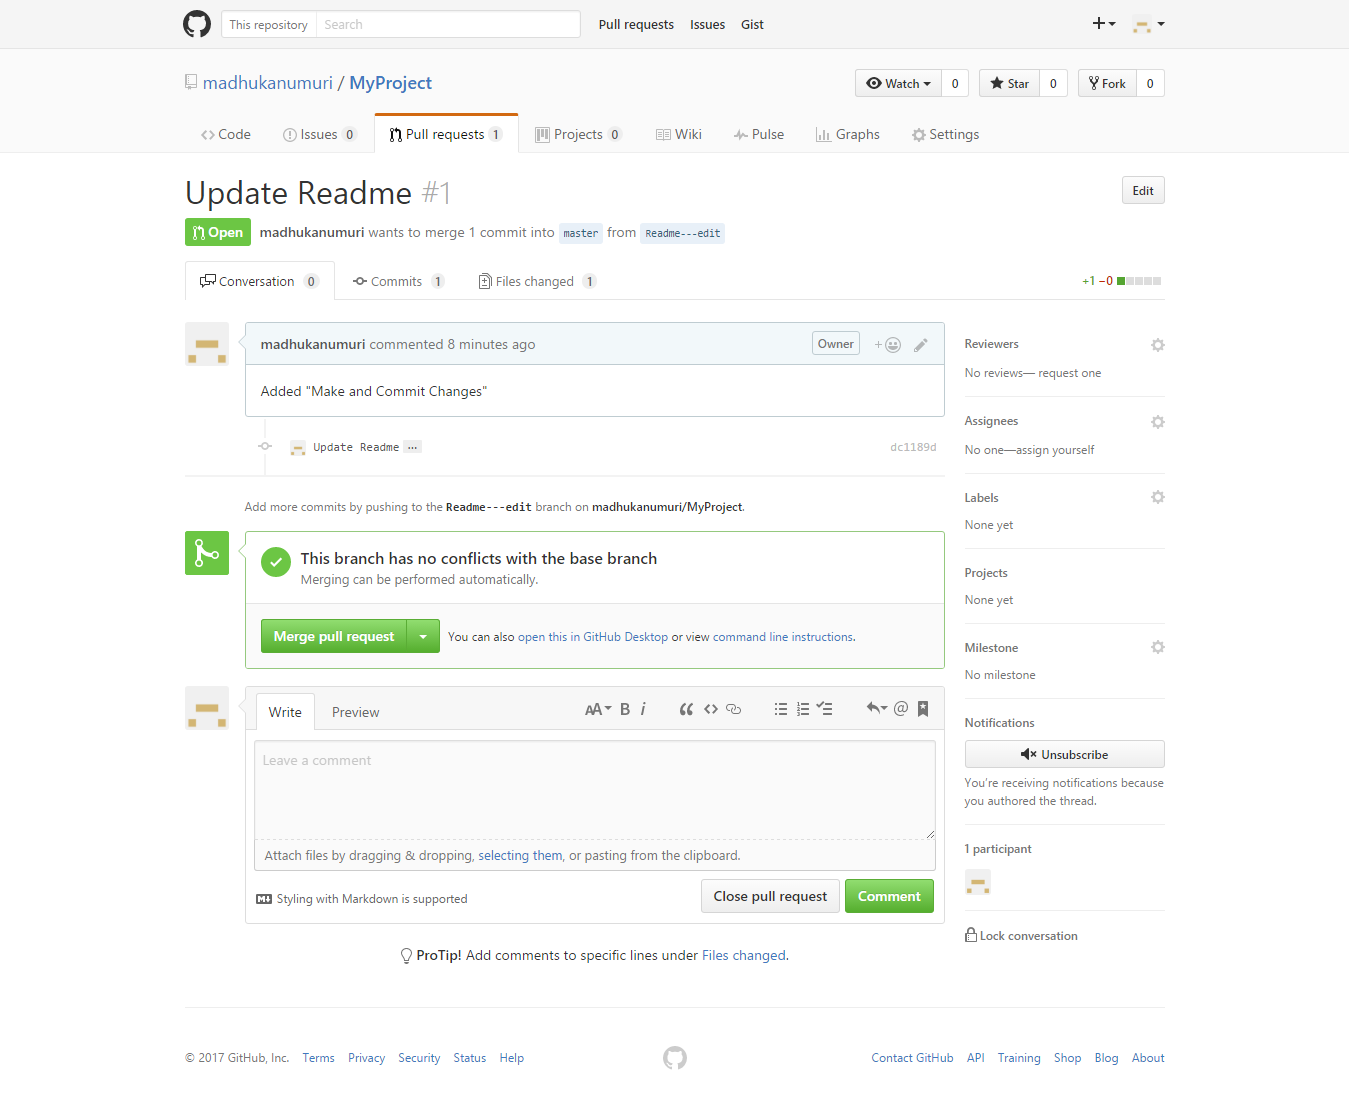
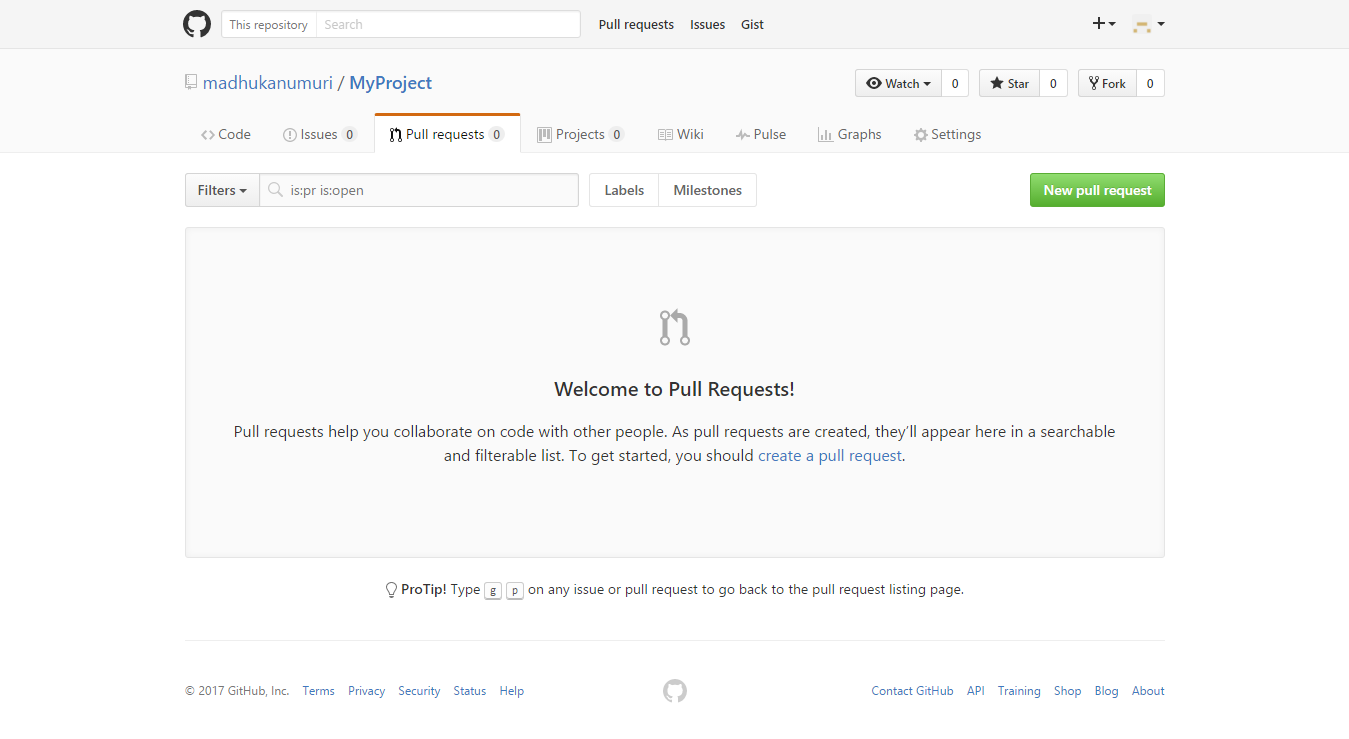
Step 4: Open a Pull Request
- Click the Pull Request tab, then from the Pull Request page, Click the green New pull request button.
- Select the branch you made, Readme-edit, to compare with master(original). When you’re satisfied that these are the changes you want to submit, Click the big green Create Pull Request button.
- Give your pull request a title and write a brief description of your changes.
Step 5 : Merge Your Pull Request
- Click the green Merge pull request button to merge the changes into master.
- Click Confirm merge.
- Go ahead and delete the branch, since its changes have been incorporated, with the Delete branch button in the purple box.